Sunday, May 15, 2016

How to Improve Privacy of Rooftop Garden

How to Improve Privacy of Rooftop Garden | Rooftop Garden Ideas

Want to improve the privacy of your rooftop garden? See a few helpful ideas for you to follow.

One of the main advantages of having a rooftop or terrace is that you have a wide view from all sides but in some cases, this advantage becomes a disadvantage, if your rooftop is exposed to the view of all the neighbors or you have a bad view from there.

Rooftop Garden Privacy Ideas

1. Bamboo mat

Use bamboo mat to cover terrace for privacy quickly and easily. Bamboo mats look so natural and ideal for a garden like setting on a rooftop.

2. Construct Tall Walls

Construct walls that are 6 feet high to protect your terrace garden from prying eyes, this will also save you from bad view.

3. Grow Small Trees and Large Shrubs

You can grow small trees and large shrubs on your rooftop garden to hide it from neighbors.

4. Plant bamboos

Bamboos are a great way to cover a balcony or terrace for privacy. They grow quickly and are low maintenance.

5. Cover with wooden planks

Cover your terrace garden with wood to give it amazing modern look.

6. Grow Hedging plants

You can grow hedging plants all around your roof terrace to hide its view for others for privacy.

7. Artificial hedging

Busy person? Artificial hedging is the solution.

8. Fabric Or Net

Covering a rooftop with a fabric or net is a maintenance free solution which you can opt for.

How to Grow Spinach in Pots

How to Grow Spinach in Pots | Growing Spinach in Containers & Care

Learn how to spinach in pots, it is one of the vegetables that you can grow in some shade and in any kind of space. Growing spinach in containers is easy too you can even grow it indoors on a windowsill.

Growing Spinach in Pots from Seeds

Sow seeds 1/2 inches deep directly in containers or in a seed tray. Seedlings will germinate in 5-14 days depending on the variety and growing conditions. If you have sown seeds in a seed tray wait until 2-3 true leaves appear in each plant and then transplant them into the original pots carefully.

Choosing a pot

For growing spinach in pots, choose a pot that is least 6-8 inches deep. You don’t need a very deep pot rather use a wide pot. You can either use so many small pots and grow one plant in each or select large window boxes, wooden boxes or crates.

Spacing

Provide each spinach plant a space of 3 inches, if you want to pick large leaves give more space to each plant, 5 inches. If you want to harvest leaves at very young age, then this area can be reduced to 2 inches only. Divide the planter box into squares, and see how many plants will feel comfortable in it.

Requirements for Growing Spinach in Containers

Position

If you are growing spinach in fall (autumn), keep the plant in a sunny spot (in mild climates) due to shorter days and less intensity of the sun. For spring and summer planting keep your potted plants in a location where it receives some shade, especially in the afternoon. In subtropical or tropical climate, place the containers in a spot that receives plenty of shade.

Soil

For growing spinach in containers, use quality potting mix rich in organic matter. The texture of soil must be crumbly and loamy. Avoid soil that clogs the drainage and remains waterlogged. Well-draining soil is most important factor for the optimum growth of spinach in containers. Soil pH must be neutral.

Watering

When growing spinach in containers avoid water stagnation because it will lead to the development of rot and various fungal diseases. Also, avoid wetting the foliage. Keep the soil moist but not soggy or wet. It is necessary to take care of good drainage in the pot.

Temperature

Spinach seeds germinate in temperatures as low as 40 F (4 C) and in high temperatures too. The best soil temperature for growing spinach falls in the range of 50-80 F (10-27 C). Many spinach cultivars can tolerate temperature down to 20 F (-6) and up to 90 F (32 C) easily. Once the temperature starts to soar high you may need to provide shade to your plants.

Growing Spinach Indoors

Growing spinach indoors on a windowsill is a great idea (as it doesn’t require a lot of sunlight) if you’re short of outdoor space. For this, buy a few 6 inches deep small pots and grow spinach in them. You can also grow herbs and annual flowers there.

Spinach Care

Growing spinach in pots doesn’t need special care. Regular watering, fertilizing and the right soil is the key to the great harvest.

Fertilizing

For growing healthy green spinach, you have to provide nitrogen. At the time of planting, you can mix time-based fertilizer or you can add a lot of compost or well-rotted manure, this will provide nutrients slowly. Feeding the plant with fish emulsion, compost or manure tea in the middle of the growth and so on is a nice organic way to promote the plants. If you have not done added time-based fertilizer, you can also feed the plant with balanced liquid fertilizer at regular intervals.

Mulching

Do mulching, even if you’re growing spinach in pots. Mulching plants with organic matter will help in retaining moisture.

Pests and Diseases

You don’t need to worry much about pests as you’re growing spinach in containers, in a small space and you can easily control them. However, keeping an eye on leaf-eating insects like slugs and caterpillars and other common garden pests like aphids will help you in eliminating them in time.

A Few Tips for Growing Spinach in Tropics

It is a cool season crop but growing spinach in tropics and subtropics is extremely easy, moreover, you can grow it successively as a bi-annual crop, except in hot summer months. You’ll need to provide it shade and enough water to keep the soil temperature cool and moist.

In warm weather, vegetables like lettuce and spinach begin to bolt early and start to set seeds. One of the most important thing you need to consider when growing spinach in tropics is to grow heat tolerant varieties (there are a lot of Asian varieties that are suitable for tropical climate) that grow slowly and do not bolt quickly. These varieties easily tolerate the heat and humidity.

Harvesting

The spinach plant will be ready for harvest 37-50 days after germination depending on the growing conditions and cultivar.

Harvesting can be done when the plant has formed at least 5-6 healthy leaves and they are at least 3-4 inches long. Pick outer leaves first and leave the new inner leaves so that they continue to grow or cut the whole plant off at the base with a knife or scissor, the plant will resprout again.

When the weather becomes humid and hot (in warm climates) the plant tends to form an erect stem, on which you can see some small yellow or green flowers developing. To coincide with the flowering and the subsequent production of flowers, the foliage of the plant thickens and changes in flavor (more bitter), which is called bolting so it is convenient to harvest the plant before it starts flowering for better taste.

Growing Okra In Pots

Growing Okra In Pots | How To Grow Okra In Containers

Learn how to grow okra in containers in this article. Growing okra in pots doesn’t require a lot of space and it is easy too if you complete all of the planting requirements.

Okra, which is also called lady’s finger is a warm season tropical vegetable that is also grown for ornamental purposes. Its delicate foliage and showy blooms that look like hibiscus (don’t forget okra belongs to the same hibiscus family) look amazing.

Very low in calories (25 to 40 kcal per 100g), okra is a vegetable rich in vitamins A, C and P, calcium and many minerals.

Choosing a pot

Choose a pot of whatever material you like. Pot should be at least 3 gallons in size. Ideally, a 5-gallon pot that is 10-12 inches deep and similar in diameter would be perfect for one okra plant if you have got a larger pot you can grow a few plants in it. Best to choose a black colored pot as okra loves heat.

Planting Okra Seeds

The first step for growing okra is to get the seeds. Ask for the dwarf okra variety that will not grow above 5 feet tall. However, you can grow any okra variety in a pot but it is best if you choose the dwarf one. If you live in a climate with short summers, search for varieties that mature fast.

The best planting time is when the temperature starts to stay above 55-60 F (13-16 C) and all the dangers of frost are passed. Growing okra is possible year round if you live in any other subtropical or tropical region on our earth.

Due to its taproot, okra doesn’t transplant well that’s why you’ll have to directly plant the seeds in the container or in a biodegradable pot. Sow 2-3 okra seeds 1/2 to 1 inch deep in each pot. Water with a sprayer and keep the seeds in a bright warm place, the substrate should remain moist until seeds germinate. The germination takes 5 to 10 days after sowing. The more warmth the faster the germination.

Requirements for Growing Okra in Pots

Position

Pick a spot that receives full sun (at least 5-6 hours of sunlight is essential). Like tomatoes and peppers, okra requires plenty of sunlight to produce well.

Soil

The soil you use must be loamy and crumbly, it must be well draining too. Opt for a soilless potting mix that is rich in organic matter. You can also add a lot of compost or aged manure to provide the constant supply of nutrients to your okra plant.

Watering

Okra requires slightly moist soil. Water regularly to keep the soil uniformly moist and particularly more from the beginning of the flowering period and until the end of production.

Okra Plant Care
Fertilization

Mix manure in soil to provide nutrients to the plant, you can also side dress the plant with it. Also, at the time of planting, you can add balanced fertilizer if you want. Once the plant has reached the height of 6 inches apply a dose of balanced fertilizer again. Keep remember that if your soil is nitrogen rich it may promote vegetative growth at the expense of fruiting so maintain the balance. Later on, feed the plant with low in nitrogen fertilizer such as NPK 5-10-15 or 6-12-12.

Pollination

Okra is self-pollinating so you don’t need to care about pollination.

Pinching and Topping

As you’re growing okra in containers, dwarf varieties we consider, the plant will not exceed the height of 5 feet. In that case, you don’t need to care about pinching or topping.

Pests and Diseases

Okra is susceptible to fusarium wilt and nematode attack as well as aphids and whiteflies in pests. Mealybugs also affect the plant’s growth. However, these pests actually do more damage on plants grown in large quantities. As you’re growing okra in pots you can easily control them.

Harvesting

Okra requires frequent harvesting. It blooms about two months from planting and the fruits appear 5-7 days after flowering. The fruits/pods are harvested when they are still tender, otherwise, they become fibrous and too hard to be eaten. Ideally, the picking length is between 3 to 5 inches.

How to see if okras are not too late to be picked?

Bend the tip of any fruit and if it breaks easily this means that they are still tender and crispy and good to harvest.

Best Fruits To Grow In Pots

Best Fruits To Grow In Pots | Fruits For Containers

Not only the vegetables but fruits can be grown in pots too. Here are 14 best fruits to grow in pots.

Buy a disease free potted plant from a reputed nursery or online and start in a small to medium sized pot (3-5 gallons) and then repot the plant gradually into the bigger ones. A 20-25 gallon size pot is an ideal one for a fruit tree in the container.

Best Fruits To Grow In Pots

1. Lemon

Lemon trees have adapted themselves for container gardening. However, it is a tropical fruit but gardeners in cool temperate regions are also successfully growing this tangy and sour fruit in containers. 
2. Strawberries

Strawberries are without a doubt one of the best fruits to grow in pots. The best about growing strawberries in containers is they are easy to grow, don’t require large pots or space and you can grow on your small urban balcony. You can also try to grow strawberries in tropics in winters.
3. Apple

Dwarf apple trees are very suitable for growing in pots, you can even keep on a balcony or small terrace. When growing an apple tree in such a small space it would be better if you choose a self-fertile variety so that you don’t need to grow more than one plant.
4. Pomegranate

Pomegranate is one of the juiciest and healthiest fruits and perhaps the easiest to grow in pots because it has shallow root system when compared to other large fruit trees. If you’ve grown citrus in pot, growing pomegranates in containers can not be difficult for you too. Moreover, pomegranate is more cold hardy and easy to grow. 
5. Fig

As figs are most suitable for warm temperate regions it is best to grow a fig tree in a pot if you live in a climate where winters are harsh or you don’t have enough space. Choose an appropriate variety to grow in a pot and provide plenty of sun to your plant. Regular pruning and fertilization are necessary.
6. Nectarines and Peaches

Both the nectarines and peaches are available in dwarf varieties. Most of these dwarf varieties don’t exceed the height of 6-8 feet and are self-fertile. Some dwarf peach varieties are “Golden Gem”, “El Dorado”, “Garden Gold” and “Southern Sweet”. Dwarf nectarine varieties you can grow in pots are “Nectarcrest”, “Fantasia”.
7. Cherry

Bush cherry cultivars are suitable for container gardening. Cherries prefer a mild climate and a little water as it dislikes wet feet. However, drought and high temperatures could damage the plant as well, but it survives well in the cold. The cherry tree favors a soil that is well drained and composed of plenty of organic matter.
8. Guava

Guava tree will delight you with its sweetly scented flowers, delicious fruits, and beautiful tropical appearance. Guava loves the sunny and warm exposure. It is a tropical plant but very much adaptable to temperate climates with moderate winter.
9. Watermelon

Watermelons are easy to grow in pots, all they need is a good support and well-drained potting soil. Growing watermelon is similar to cucumbers.
10. Banana

Growing banana in a pot is easy and its lush green appearance can give any place a tropical look and feel. Banana trees grow in tropical and subtropical parts of the world and therefore they love full sun, heat and humidity. However, there are cultivars available that are mildly cold hardy and suitable for warm temperate zones.
11. Pineapple

Pineapple plants are small and compact and never grow more than 3-6 feet tall. Also, the plant has shallow roots when compared to other fruit bearing plants or trees that’s why it is possible to grow them in pots. However, pineapples require consistently warm and humid climate to thrive but you can also grow them as a houseplant in temperates, providing several hours of direct sunlight daily.
12. Raspberries

Raspberries are bit tricky and unruly to grow in containers but still everbearing varieties like “Heritage”, “Raspberry Shortcake” and “Fall Gold” are a good choice. All these varieties are self-fertile and easy to grow in pots.
13. Blueberries

Growing blueberries in pots is a good idea if your soil is not acidic. Providing a potting mix for Azaleas and camellias or other acid loving plants and a large pot is essential so that your blueberry plant will grow easily and provide fruit for years.
14. Oranges and Citruses

All the oranges and citruses can be grown in pots as they are rather large shrubs or small trees. If you live in a climate where winters are mild these fruits are really easy to grow, however, you can still grow an orange tree in a cold climate with care in winter.

Growing Cauliflower in Containers

Growing Cauliflower in Containers | Care & How to Grow Cauliflower in Containers


Learn how to grow cauliflower in containers in this article. Growing cauliflowers in containers is not very difficult if you know its proper requirements and ideal growing conditions.
However, cauliflower is a cool season crop but there are many hybrid cultivars available for both temperate and tropical weather, which means it can be grown diversely in a variety of climates.

How to Grow Cauliflower in Containers

Planting cauliflower in containers

It is important to plant the variety that fits the season and climate you are living in. Cauliflowers can be planted anytime in frost free climate when the temperature is in the range of 50-85 F (10 C to 30 C). At the time when heads are maturing, the ideal temperature is around 60-70 F (15-20 C).

Generally, in warmer regions, you can start to sow cauliflower seeds in fall and continue to sow the seeds until the end of winter. In cooler zones, it is better to sow the seeds until late winter and up to spring to get summer or fall harvest.

Propagation

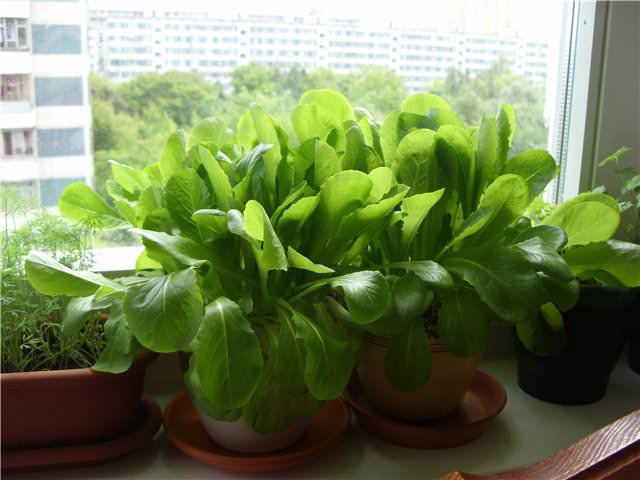
Sowing, transplanting, and planting is same as for the cabbages. Sow the seeds in a seed starting mix, 1 or 2 cm deep and 4 cm apart. Once the seedlings germinated and plants have 3 or 4 leaves, you can start growing cauliflower in containers.

Choosing a Container

Choose a pot that is 12 inches deep and at least 10 inches wide to allow enough room for a plant to grow. Also, make sure it has enough drainage holes in the bottom. In such a pot you can grow one plant.

You can also grow 2-3 cauliflower plants together in large buckets, half whiskey barrels and even in sacks.

Requirements for Growing Cauliflower in Containers

Position

Prefer to keep the pot in a sunny spot that receives at least 6 hours of sun. In tropics, grow the plant in a partial sun.

Soil

Like all brassicas, cauliflowers are quite demanding on the soil. Fill the pot with a quality potting soil that is light, deep, humus-rich and slightly clayey. As cauliflower grows best in moist soil choose the substrate that holds some moisture but also drains well.

Watering

Because growing cauliflower requires moist soil, you’ll need to water it regularly. It is important to prevent the drying of the soil in the period when the seedling is maturing and at the time of head formation. Drought-like conditions lead to the formation of smaller or separate heads or even to a complete loss of them. Overwatering also impede its growth, which must be avoided.

Cauliflower Plant Care

When the head or flower (curd) of cauliflower becomes 2-3 inches in diameter (this is unnecessary for colored varieties), cover it with the inner leaves by breaking or tying them over the head. It is called blanching. This will protect the head from the sun and you’ll get healthy white colored and more flavorsome cauliflower after harvest.

Fertilizer

Cauliflower plant is a heavy feeder. You can mix compost or well-rotted manure into the soil at the time of planting. Besides this, fertilize it with 10-10-10 water soluble fertilizer monthly.

Mulching

Mulching can be skipped when you’re growing cauliflower in containers. But you can do it to keep the soil cool and preserve moisture in the soil. In winter, mulching will keep the soil warm and insulate the roots from cold.

Pests and Diseases

Pests that damage the leaves, such as flea beetles, the larva of cabbage butterfly and moths love to feed on this plant. It can also be attacked by aphids and white flies.

In diseases, it is infected by clubroot, which can be checked if quality soil is used. It also gets affected by powdery mildew. To prevent it, avoid wetting the foliage.

Harvesting

The harvesting of cauliflower takes place virtually throughout the year, depending on the variety and sowing period. Generally, harvesting takes place about 3-4 months after planting.

You can check if cauliflower is ready for harvest when the head (curd) is fully developed (6 to 12 inches in diameter, depending on the variety) and still compact. Once the blanching is done you can harvest the cauliflower in 7-12 days.

Things to Remember

Cauliflower heads (flowers) become ready for harvest in 3-5 months.
Cauliflower requires moderate temperature, around 60 – 75 F is ideal.
Too high or too cold temperature leads to premature heading.
Cauliflower requires constant nutrient supply and slightly moist soil with ideal pH around 6.5-6.8.
Right watering is the key to growing cauliflowers. For the best result, water carefully. Both underwatering or overwatering must be avoided.

Growing Tomatoes on a Balcony

Growing Tomatoes on a Balcony
Growing tomatoes on a balcony is rewarding. Besides their flavor, tomatoes can also serve as an ornamental plant.


Comes in various colors and sizes- red, orange, brown and yellow, pear-shaped or round and tangy aroma of their leaves is amazing. Learn ‘how to grow tomatoes on a balcony’ step by step in this article.

What Type of Tomatoes are Suitable for Balconies

Growing Tomatoes on a BalconyGood news is that all the tomato varieties for container gardening but the bad news is that you can’t grow tomato varieties that spread and grow too tall (indeterminate ones). Good idea is to choose determinate varieties of tomatoes that are locally available and grown successfully.
Prefer cherry tomatoes, these are extremely easy to grow, low care and produce lots of fruits in a growing season.
Tomatoes on the balcony should be planted in well-drained, stable pots. A large amount of fruit and stems can cause toppling of plastic or other lightweight pots in the wind.

Pots should be at least 12 inches deep and wide in diameter.
Tomato requires full sun so place them in the sunniest position of your balcony.

Soil

Plant tomatoes in fertile soil to ensure favorable growth. You can buy a potting mix or make your own. Obtain compost or well-rotted manure, garden soil and gravel or expanded clay for preparation.

While preparing the soil, remember it should have to be well drained, slightly acidic (pH 6-6.8) and loamy, tomatoes does not thrive well in heavy soil. In addition, apply slow release tomato fertilizer to the soil so that the plants will receive nutrition time to time.

Planting Tomatoes

Either buy potted plants from the nursery or prepare your own seedlings. Sow tomato seeds when the risk of frost will pass and spring arrives. (*If you live in tropics you can plant and grow tomatoes year round). Seeds will germinate quickly within 5-10 days. Transplant them in containers when two real leaves will form. Tomato seedlings should be planted deeply to the level of the first leaf, to generate deep and additional roots and increase the collection of nutrients by the plant.

Tomato Plant Care

Fertilizing

Tomatoes are heavy feeders, even if you’ve already applied slow release fertilizer you’ll still need to fertilize them later.
Best time to fertilize tomatoes is when you’ll see a lot of foliage growth but fewer fruits or flowers in comparison or the time when the plant looks leggy and leaves turn yellow.
Fertilize in less amount but more is the secret of high yield of tomatoes.
Fertilize once in a week or two according to the needs of your plant.
Apply liquid fertilizers as given in the packet instructions, morning time is best.
Be sure to choose a fertilizer with a higher content of potassium and phosphorus. For those who appreciate organic vegetables, use natural fertilizers like manure, compost or biohumus.

Watering

Tomatoes on the balcony need constantly moist soil as balconies remain windier than regular gardens.
Regular watering of plants is essential, even twice on a dry windy day in summer.
Water tomatoes in a way that it’ll not soak its leaves. Wet leaves are the main cause of blight and other fungal diseases.

Additional Tips

1. Remove suckers time to time during growth as they drain the nutrition of plants and prevent fruiting and flowering.
2. If you’re growing tall varieties, you’ll need to support them: use cage or trellis, you can also tie them to railings of your balcony.
3. The best temperature for growing tomatoes is when it ranges between 50F to 95F (10C-35C). Temperature below or above this is not suitable for growing tomatoes.